8 Secrets for Vacuum-Sealing Your Fish
Vacuum-sealing fish may seem like an extensive process at first glance, but all good things take time. By vacuum-sealing, your fish can last for months and taste as fresh as the day it was caught. Instead of trying to cook freezer-burned fish with a strong fishy taste, avoid it altogether by vacuum-sealing your next catch.
What is Vacuum Sealing & Does it Make a Difference?
Food Saver says Americans lose $1,300 on spoiled food annually. Save money and your catch by using these nine tips for vacuum-sealing fish. Vacuum sealing removes oxygen and moisture from plastic bags used to store food, which are the culprits that cause food to expire and spoil. By eliminating the oxygen, vacuum sealing significantly increases the shelf life of food. Typically, there are one to two fillets per vacuum-sealed bag. Once the fish is placed inside, the vacuum sealer seals it shut by thermally bonding the bag. By vacuum sealing, the freezer life of your fish can last for 1-2 years without freezer burn spots or spoilage.
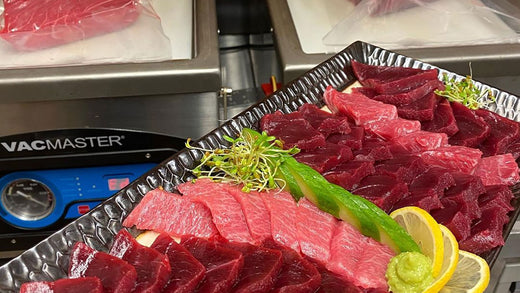
1. Select a Vacuum Sealer
There are countless vacuum sealer options, ranging from personal use to industrial grade. Keep in mind that vacuum sealers can be expensive, depending on their features. As a starting point, check out this recent vacuum sealer review from New York Magazine here. This review covers the leading vacuum sealers with basic features, ranging from an affordable $47 to top-of-the-line models at $280. Regardless of your familiarity with vacuum sealing, the benefits make it a worthwhile investment for anglers who regularly store fish.

2. Keep the Sealing Bag Dry
When preparing to seal a fillet in its bag, make sure the end you're sealing is completely dry. Some anglers like to place paper towels at the top 2-3 inches of the bag, under the bag's seal, as an extra precaution. Before sealing, ensure that no part of your fish fillet is in the sealing area. Otherwise, it can lead to spoilage. The goal is to seal your fillet in its bag with as little moisture as possible.
3. Pre-Freeze Your Fillets
The pre-freeze is the game changer. By freezing your fish first, you help lock in your catch’s moisture and flavor. Depending on how soon you plan to eat your fish, feel free to freeze the catch whole or slice it up. Then, keep your fish in the freezer for 1-2 hours before vacuum sealing or freezing long-term. Some anglers wrap their fillets in plastic wrap, then partially freeze them before vacuum sealing. Whichever you decide, always pre-freeze your fillets first.
4. Soak Your Catch in Brine Before Sealing
Brine is like a marinade. The simplest brine consists of salt and water. Salt is vital to brines because it helps remove water to guarantee a fresh taste. For the best results, anglers should let their fish soak in a brine for at least five minutes before putting it into the freezer. Even if you aren’t vacuum sealing your fish, using brine can enhance the flavor of your fish before you eat it. Click here for a basic fish brine recipe.
5. Dry Fillets Thoroughly with Paper Towels
The goal of vacuum-sealing fish is to remove as much moisture as possible so your fish stays fresh for months. Use paper towels to dry your fish fillets because they absorb moisture quickly and are easy to discard. Absorbent pads are another excellent option because they soak up bacteria to preserve the quality of your catch and give it a less fishy taste. This step is essential if you decide to brine your fish, as your fillets will be wet after soaking in the brine.
6. Check for Bones
Check carefully for any bones, particularly rib bones. Occasionally, rib bones can protrude from fillets and pierce sealed bags. Removing bones also makes your catch more enjoyable to eat months later.
7. Season Fish to Lock in Flavor
Now is the time to add extra flavor to your fish. Some anglers prefer to put their fillets in a marinade and vacuum seal it. However, that requires an expensive chamber sealer. Instead, you can place your fillet in a Ziploc bag with the marinade, zip it shut, and vacuum seal it. As for seasoning recipes, there is one for every craving. From sweet to spicy, find the best fish seasoning for you. Click here for an all-around fish seasoning recipe, or try this Cajun seasoning recipe here.
8. Avoid Overfilling Bags to be Sealed
It's important to avoid overfilling because keeping air and moisture out of the vacuum seal bags becomes more challenging as you add more fish to a bag. Avoid stacking fish fillets on each other and lay them flat instead. Fill the vacuum seal bag evenly without overfilling to keep your fish fresh.

Although vacuum sealing takes longer, the process ensures an incredible-tasting fish months later. After completing these eight steps, your fish should taste as fresh as it did the day you caught it.
When you're ready to enjoy your vacuum-sealed fish from the freezer, place your frozen fish in a deep bowl or tray. Then, fill it with cold tap water. Contrary to belief, do not use warm or hot water, and ensure all the pieces are fully submerged. Next, let your fish thaw in the cold water for 15-20 minutes. Now, you can remove your fish from the vacuum seal packaging, blot it dry, and cook. It’s best practice to leave your fish in the vacuum seal bag as it thaws because otherwise, it will absorb water, leading to a weaker flavor. To learn more, check out the step-by-step defrosting guide.
![]()
Make the most out of your catch by trying new recipes, such as Mahi Mahi sliders, Blackened Amberjack, or this Bluefin Sashimi recipe.